Bulk import user pictures in to Active Directory
• Craig
There are so many scripts that will do this for you and as good as it is to be knee deep in Power Shell, sometimes it’s handy to have a decent GUI tool knocking about. My favorite (and one of the only ones that I have seen that does what it says on the tin) is Bulk AD Users by WiseSoft It’s as simple as a connecting to your AD DS instance and updating the attribute that you want to change. In this case, unless there are other requirements, I recommend using the thumbnailPhoto attribute as it interfaces nicely with Exchange and SharePoint 2010.
The download link can be found here. It doesn’t need installing so just extract it into a folder and run the executable.
This article assumes that:
- You have your a photo share set up under the following location \Server01PhotoShare
- Your files are named using the sAMAccountName (users Log on ID) and as JPG files. E.g. JSmith.JPG
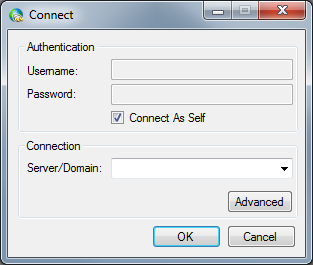
Once the program has loaded connect to the Domain that you want to update by hitting F2. If you are connected to a domain it will pick up your FQDN and you will have the option to “Connect As Self” or enter another user account with higher privileges.
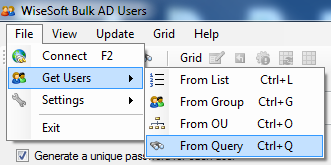
You then have the option to load users from a List, Group, OU or Query. In most cases it is best to select OU. Hit File > Get Users > From Group.
This should then load your Active directory tree structure, Select the appropriate OU then click OK. A list of users from the selected Organisational Unit will now be displayed.
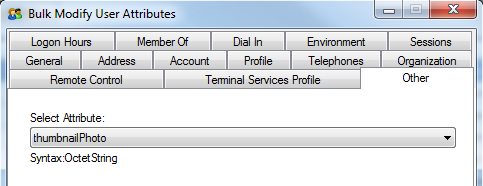
To begin modifying the thumbnailPhoto attribute click on Update > Bulk Modify then select the Other tab followed by the attribute from the drop down list.
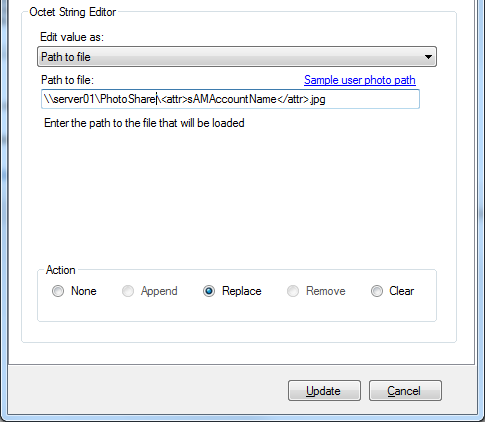
Select replace from the Action section then Edit value as “Path to file”.
Enter the UNC path to your photo share followed by sAMAccountName.JPG
Double check your settings and hit Update. This should then process each user account from the selected OU and update the thumbnailPhoto attribute. The program will also list any errors or failures.
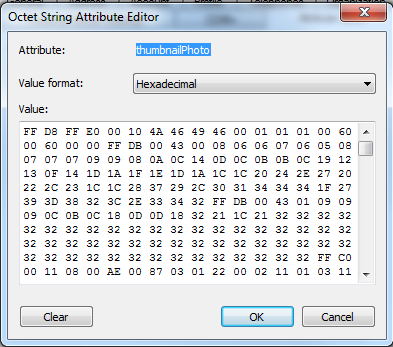
To test that the update was successful, open AD DS select a user and click on the Attribute Editor tab. Scroll down to the thumbnailPhoto entry and you should see a hexadecimal string in the value field. If you have a pre Server 2008 environment you can use AdsiEdit which is part of the Windows Server 2003 support tools package found on the CD under supporttoolssupptools.msi